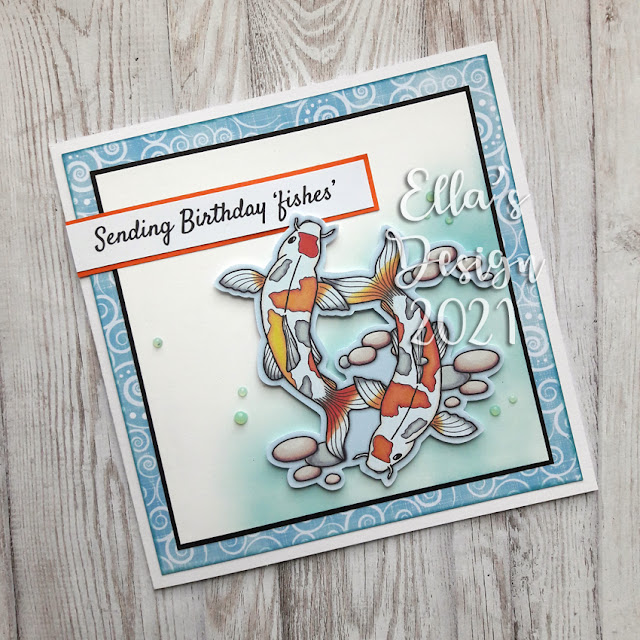
Friday 26 February 2021

Stencil Bouquet with Distress background...

Good afternoon, Blogger buddies! I am back to share another card I made using my Stencil Bouquet precoloured toppers...

I remember being at a show a good few years ago and chatting with a fellow stall holder who asked what I did, to which I replied CD/digital crafting...I will never forget her reply, that "CD (digital) crafting stunts creativity!"...

I never really understood this...digital crafting is a tool and medium that can be used alongside any other and I hope that the card I'm sharing today proves this...


I used the oval precoloured Peach topper and fussy cut some of the extra elements to decoupage onto the image (I must admit, I got a bit scissor happy and had intended to leave a white border around the decoupage elements, but inked the edges instead).

I then proceeded to make a background, inspired by the talented Gina K...I wanted it to look like an old painted wooden board and dragged Iced Spruce and Broken China Distress Oxides over the cardstock in a single direction, to give the impression of a grain. I softened some of the lines with a blending brush and added some colour in places with the brush too. I cut to size (17 x 12cm) and then inked the edges with Tuxedo Black Memento using a blending brush (how did I craft without these?!) before attaching to a 5 x 7 inch card blank.

I cut a cream and black oval using my Spellbinders Petite Oval dies and mat the image on top. I added a band of aqua blue polka dot from my scrap drawer, which was also mat onto black and attached this across the card slightly above middle, then attached the topper.

I felt I needed to bring the pink back in somewhere as the card was looking a bit dark, so cut a 1cm strip of pink polka dot, inked the edges with Abandoned Coral and attached across the bottom third of the card.

I embellished with some Dew Drops on the rose hips, diamantes to the flower centres and silver border waste to look like nail heads.

I added a stamped sentiment in two parts, matting one onto pink card and fussy cutting the other, leaving a white border...

I hope this goes to show that no individual element of crafting can ever stunt creativity, the creativity comes from what you do with those elements and enjoying the process. I have been very lucky to have some wonderful feedback and comments from fellow crafters about my creations, but it is surprising how just one negative one can stay with you forever...so remember...be kind, support and encourage!

Crafty hugs,


Stencil bouquet...

Good morning, crafty friends! The sun is shining and there's a hint of Spring in the air here in North Wales, long may it continue!...

I have another new design over at Craftsuprint, with this one being a pretty stencil style bouquet in two different colourways...


This first card uses one of the precoloured topper sheets which includes a square card front panel and then I used the extra floral elements, fussy cut with a white border, to decoupage over the top. I added the sentiment that comes on the sheet, cut with fishtail ends and mat onto cream card, then finished off with some diamantes and dew drops...


For my second card, I used the bouquet element from the peach topper sheet and fussy cut, leaving a white border. I embossed a piece of white cardstock, 13.5cm square with an XCut Circle folder and mat onto pink paper, 14cm square. I placed the elements roughly where I wanted them and then stamped the word Happy in position before attaching the floral elements using foam pads. The Birthday sentiment was stamped from Waffle Flower Crafts Happy Birthday sentiments set and then fussy cut, again leaving a white border. I added some dew drops to the centre of the small flowers and attached the panel to a cream card base...

I am really pleased with the soft, stencil style that this design has and of course is well and truly in my pastel comfort zone! I hope you like it too!...it's available over on Craftusprint HERE for just £2.00 for the precoloured topper sheet in Peach and Lilac colour tones, the black line digistamp and pale line digistamp, plus an elements sheet of individual precoloured flower and leaf elements for you to build your own bouquets...

I'll be back later with another card using this pretty set, until then have a fabulous Friday...

Hugs,


Wednesday 24 February 2021

Update on my Etsy store...

Good evening, crafty buddies! As you may or may not have noticed, there are not very many items in my Etsy shop...with time and finances being so much more limited after hubby's redundancy last year and me having to work more, I have had to make the decision to switch over to craftsuprint.com to sell my designs...

Unfortunately Etsy still charges a listing fee every 3 months, regardless of whether you sell an item and with not enough sales to cover the cost and rather than stop designing all together, I have moved over to Craftsuprint.  

I still thoroughly enjoy the design process and want to continue to share my artwork with you all when time and motivation allow, so hope that you will continue to support my work and enjoy using my designs...

I have something new in the pipeline and am currently working on sample cards for a new design that I am hoping to get listed in the next couple of days, so watch this space!...

Crafty hugs,


Monday 22 February 2021

More koi...

Hello there, crafty friends! The sun is shining and there's a feel of Spring in the air, here in North Wales...long may it continue!

I have been having a play with my Koi digistamp this morning and decided to make a background that was the focal point of the card. So I saved the individual koi digistamp (there's a tutorial on how to do this in the Printing Tutorials tab at the top of my blog page, just under the header) and then imported it into my graphics program before repeating it to create a random background...


I printed it off and cut a 14cm square panel before colouring up with my alcohol markers...I Googled some images to give me some inspiration for colour combinations...


I inked the edges of the panel with Broken China Distress Oxide and mat it onto black before adding a band of the Koi Swirl paper, again mat onto black.

I stamped the Birthday word from my Waffle Flower Birthday Sentiments set onto white card and fussy cut leaving a white border, then attached to the card front using foam pads. I finished the sentiment by stamping the word wishes from the O Christmas Tree Stamp set that came free with SC&P Issue 209.

I highlighted the fish with crystal glitter and then attached the panel to a 6 x 6 inch card blank...

I also created these clean and simple cards using the left over precoloured toppers from my previous card...


https://www.craftsuprint.com/card-making/mini-kits/mini-kits-animals/koi-mini-kit.cfm

I thoroughly enjoyed sitting in the sunshine (as our house is east facing) whilst colouring these pretty fishes and hope that you take inspiration from my creations...

Enjoy your day, whatever you're doing and I hope that the sun is shining for you too!

Crafty hugs,


Saturday 20 February 2021

Koi...

 Good morning, crafty friends! I have another new design over at craftsuprint.com, featuring koi carp and waterlilies, so thought I would share a sample card for you to case...

I started by printing off the Koi precoloured topper sheet and papers, then took a 5 x 7 inch card blank and attached a piece of the Koi Gingham paper, cut down to 17 x 12cm and edges inked with Cracked Pistachio.

I added a piece of white paper 16 x 11cm, again inking the edges with cracked Pistachio.

Next I cut a piece of the Koi Swirl paper down to 13 x 9cm, inked the edges with Broken China and mat onto a piece of blue paper 13.5 x 9.5cm. I attached this to the card at an angle.

I cut a piece of Koi Dot paper to 2.5cm, inked the edges with Vintage Photo, mat onto brown card and then attached to my card before cutting off the excess.

I cut the Koi Carp image using a circle die, inked the edges with Broken China and mat this onto a slighter larger orange circle. I cut off a small portion of the right hand side of the circle and attached this to my card using foam tape.

I then cut out the individual Koi image and the pebbles, leaving a white border and decoupaged these onto the card using foam pads.

I cut one of the sentiments down, inked the edges with Vintage Photo and mat onto brown card before adding this to my card using foam pads on one end and glue on the end where it sat on top of the circle.

I finished off with a couple of photo corners which was a 2.5cm square cut in half diagonally and then highlighted the fish tail and fins with crystal glitter.

I hope you like my fishy card and will be back shortly with some more inspiration on how to use the other images from the topper sheet...until then...

Crafty hugs,


Wednesday 17 February 2021

Herb card...

 Good afternoon, Blogger buddies! I have a new design which is in holding over at CraftsuPrint and have popped in to share a sample card with you, with full instructions...


I started off by printing the 3 coordinating papers and precoloured topper sheet from my Herb Mini Kit.  I took a Khaki Green piece of cardstock and created a 6x6 card blank, then cut the Herb Heart paper to 14 x 14cm , inked the edges with Iced Spruce Distress Oxide and attached to the card front.

I cut a piece of the Herb Dot to 12 x 5cm, inked with Vintage Photo Distress Ink, matted onto brown card and then attached to the right hand side of the card front, leaving a small border of green showing.

I cut the image from the sheet and trimmed down to 11 x 8cm, saving the individual pot of basil, labels and butterflies for decoupaging. I cut out the labels and created a slit along the line of the top of the pots using a craft knife, then inserted the labels into their corresponding pots, securing with a small piece of foam pad under the top of each label.

I rounded the bottom corners of the image with a punch and mat this onto a rust coloured layer, then attached towards the bottom centre of the card front.

I cut a piece of the Herb Plaid paper to 14.8 (the width of my card base) x 2.5cm, inked the edges with Vintage Photo Distress Ink and mat onto dark brown before attaching to the card so that it covered the top edge of the image.

I cut out the individual basil pot and the butterflies, leaving a white border and attached the pot with foam pads and the butterflies with just a dot of glue in the centres so that the wings could be folded upwards.

I cut out the sentiment, inked the edges with Wilted Violet Distress Ink and mat onto lilac card, before attaching to the card using foam pads.

I finished off with some glitter on the flowers and 3 enamel dots in green...

This kit is available exclusively through my Craftsuprint store and I hope to add some more new designs in the near future.

Hugs,


Tuesday 16 February 2021

Passion for Markers - Use 3 or more papers...


Good morning, crafty buddies! I hope that you are managing to keep warm and finding some time for crafting? Spring is beginning to show signs of making an appearance and we're looking at getting into double figure temperatures by next week...positively tropical!

We have a brand new challenge started today over at Passion for Markers and our newbie Marlene has given us another super easy theme of 'Use 3 or more papers'...and it's as simple as it sounds! As long as you create something using a minimum (you can use more!) of 3 different papers and use your marker pens, whatever type of creation, you could be in with the chance of winning this week's prize...


We're being sponsored by Dies to Die For and the lovely Tracy is kindly offering one lucky winner picked at random, the chance to get their crafty hands on a £15.00 voucher to their online store...


Inspire by this card on Pinterest, I used the Old Truck digistamp from Fred She Said and coloured it up with my Pro/Flexmarkers. I used an old exercise book page for the background and then layered up different papers from my scrap drawers and added lots of embellishments to give that scrapbook feel...

I hope you can find the time to play along with our fun challenge this week and look forward to seeing all of your wonderful creations...

Got to keep it short and sweet again today, as I'm off to help hubby in the factory...time to don the boiler suit again!

Crafty hugs,


Monday 15 February 2021

More flowers and a new technique...

I had a go at making my own layering stencil...yeah, that's harder than I thought?!! My brain couldn't switch off to it needing to be a stencil and everything ended up too spaced apart...I will know for next time that the layers allow things to be closer together and even overlap. 


Food for thought and a work in progress, although I did like the individual elements when I cut them out and made this pretty, fresh card with them...


I've had this pretty acetate backed fishtail flag hanging around my desk for a while, actually from a festive project I was making and decided to put it to good use! I fussy cut the floral elements, leaving a white border and played around until I was happy with the arrangement. I cut the happy die in black and attached to white before fussy cutting and used the Many Happy Returns stamp that came in the Autumn stamp set of SC & P Issue 208 to create the rest of the sentiment. I also stamped Enjoy your day from the Waffle Flower Happy Birthday Sentiments stamp set...

I have to say, I do still LOVE pastel colour tones and think that this card turned out really fresh and Springlike...back in my comfort zone! 

Thanks for dropping by,


Another floral creation...

Good morning, my lovelies! Another floral card to share today using my Wild Rose digistamp...I'm not as enamored with this one, but hey, ho! Sometimes we can shuffle things around so much and still end up with something we're not sure of ...
 
 
I have been having a go at creating my own layering stencil too...will let you know how that goes in another post! 😜  


Short and sweet from me today, as I'm off to work with hubby...time to don the boiler suit! 
 
Crafty hugs,


Sunday 14 February 2021

Slimline Anemone card...

 Good afternoon, crafty friends! I have another floral card to share today, this time using my Buttercup digistamp coloured as an anemone flower. I don't make DL cards very often but with the current trend in the US for 'slimline' cards, I thought I would jump on the bandwagon!...


 I printed the digistamp at 3.5 x 5 inches and coloured it in with my alcohol markers, before adding some black glitter to the centres. I have to say, I am embracing white at the moment and after trying different backgrounds behind the flowers, settled for a crisp, white background to really make the flowers pop! My new Waffle Flower sentiment stamps made an appearance again and following on from my last post - a black mat AND coloured card base! A pink glittered strip added some texture and sparkle and a small sentiment stamp finished everything off...

Hope you're having a lovely Valentine's Day, whether with someone or on your own and sending love and hugs to anyone that may need it...

Hugs,


Monday 8 February 2021

Gina K Inspiration..

 I may be a bit late to the party, but last year I stumbled across Gina K Designs and her fab Facebook group...she is such an inspirational crafter and so willing to share her knowledge and ideas. She has a love of bold florals, simple designs and some fabulous techniques, plus she has also taught me to embrace black mats, coloured card bases and bold colours!

Although I would love to get my mits on some of her products (I LOVE the Little Love layering stencil) my crafty budget is a little tight at the moment, (partly because I've just treated myself to a couple of things including the fabulous Waffle Flower Birthday sentiment stamp in this card!) so I decided to revisit some of my own designs with a new crafting perspective...
 

For my card I used the Hummingbird image from Animal Antics and the Hibiscus flower digi from Say it with Flowers and coloured them up with my Promarkers - trying to keep to a bolder colour scheme!
 
I inked the background panel with Broken China Distress Oxide and stamped the WISHES sentiment using my Tim Holtz Stamping platform, before fussy cutting the flowers and bird. I raised them up on foam pads along with the large Birthday word stamp and finished off with a touch of glitter and some small pink gems for the flower centres.

I thoroughly enjoyed creating this card and even managed to use some yellow, a colour I always admire on other people's creations but very rarely use myself! It was nice to step out of my comfort zone for a change and I will have some more creations to share soon!
 
Crafty hugs,


Tuesday 2 February 2021

Passion for Markers - Dies and/or Punches...

 Good morning, crafty buddies! We have a brand new challenge starting today over at Passion for Markers...

The lovely Marie is in the hostess chair and she's given us a super easy theme of 'Dies and/or Punches'...it doesn't matter what type of project you make, as long as you use a die cut or punched element and use the marker pens of your choice, you will be eligible to be in with a chance of winning this week's prize...


We're being sponsored by the wonderful Di's Digistamps who are offering one lucky winner a $6.00 voucher to spend in their online store...

As it's my little sister's birthday today (Happy Birthday Colleen!) I decided to get ahead and make a card to send to her on her special day...


I used the ever so sweet Saturated Canary image, Love Letters, but changed the letter in her hand into a present by adding some glitter strips and a bow...

The pretty floral paper is from Make and Create 'Moments' 12x12 paper pad from The Works. I added a grosgrain ribbon border and then used my favourite little flower die set from Sweet Dixie, Delicate Blossoms and leaf die from Sizzix Funky Floral #2. I wanted to add her name somewhere on the card, but didn't want it to take centre stage and overwhelm everything else, so cut it from white card using alphabet dies.  Some gems and sprinkles finished everything off...

I hope you can find the time to play along with our super simple challenge this week and look forward to seeing all of your wonderful creations!

Hugs,

I'd like to enter my card into the following challenges :

Anything Goes with optional twist - Thank you
closes 4th Feb
Anything Goes
closes tomorrow